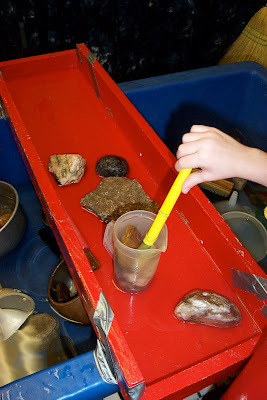
I wanted to provide a space on which to put things that were in the table. I have seen so many children hold a container against their body when they try to fill the container. What happens? It spills and they get wet. With a tray, a space is provided on which to place things. That way they do not have to hold the container against their body to fill it.
By having the tray, it also frees up the hands to experiment and perform other operations like using a funnel while pouring.
With the tray, the child can pour with less spilling and less getting wet. Even with a tray, though, there will always be spilling and getting wet. Be prepared.
In terms of exploration and learning, the tray provides another level on which to work. If you are keeping count, there are now three levels at the table. 1) There is the bottom of the table itself. 2) The pail (see previous posts) which is on the floor. 3) The tray which is above the table. The three levels have increased the spaces to explore because now there is an over, under and around. When the child moves or is transporting over, under and around the tray, a different set of large and small muscle motor operations are required. For example, you cannot just scoop something up from under the tray and lift it straight up. The child has to scoop and then lift slightly and reverse the original scooping motion. All this lays the ground work for cognitive mapping of spaces and how to operate in and around them.
The explorations take many forms. Here are just a couple:
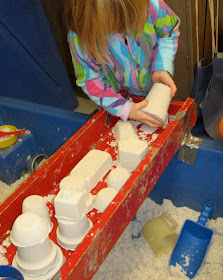
The child below is using the tray to hold her creations. The child is making forms from moon sand. The trays provides a nice platform for her work. In fact, the forms are highlighted so much better than if they were just made on top of the sand in the table itself.
This group is filling the tray to the top with moon sand. They are compacting the sand so it will fit the sides of the tray. It was as if they are forming a solid block inside the tray. They are using hammers and other clay cutting tools.
One of the boys works very hard to tamp down the sand. Another child has figured out that he could slice off a piece with a clay cutting tool. I would say that is nice large motor and fine motor work on their parts.
Here the children have completely filled the tray with animal bedding. The bedding is light and airy so it is easy to fill the tray to overflowing. In addition, it smells good.
I always attach the tray to the table with duct tape. I criss-cross the tape on both sides. For each side, one piece of tape goes from over the lip of the tray under the lip of the table, the other one is taped under the tray to the inside of the table. To make it a stronger hold, I then take a long piece of tape and wrap it around both sets of tape under the tray. The wrapping around pulls the two sets of tape tight so there is virtually no movement.
Two quick notes about this apparatus. If you are using it for water, caulk the seams with a bathroom caulk otherwise it will leak at the joints. Also, if you are using it with water, drill holes in the side so water will leak out into the table otherwise the children will fill it to overflowing. That is bad if your tray hangs over the side like the one pictured. I have had to adjust the size and number of holes depending on the creativity and enthusiasm of the group. If there are too many holes, I easily correct it with duct tape.


No comments:
Post a Comment